Loading...
Loading...
Loading...
Loading...
Loading...
Loading...
Loading...
Loading...
Loading...
Loading...
Loading...
Loading...
Loading...
Loading...
Loading...
Loading...
Loading...
Loading...
Loading...
Loading...
Loading...
Loading...
Loading...
Loading...
Loading...
Loading...
The backend REST API in Java
helm repo add onyxia https://inseefrlab.github.io/onyxia

cat << EOF > ./onyxia-values.yaml
ingress:
  enabled: true
  hosts:
    - host: onyxia.my-domain.net
EOF

helm install onyxia onyxia/onyxia -f onyxia-values.yaml
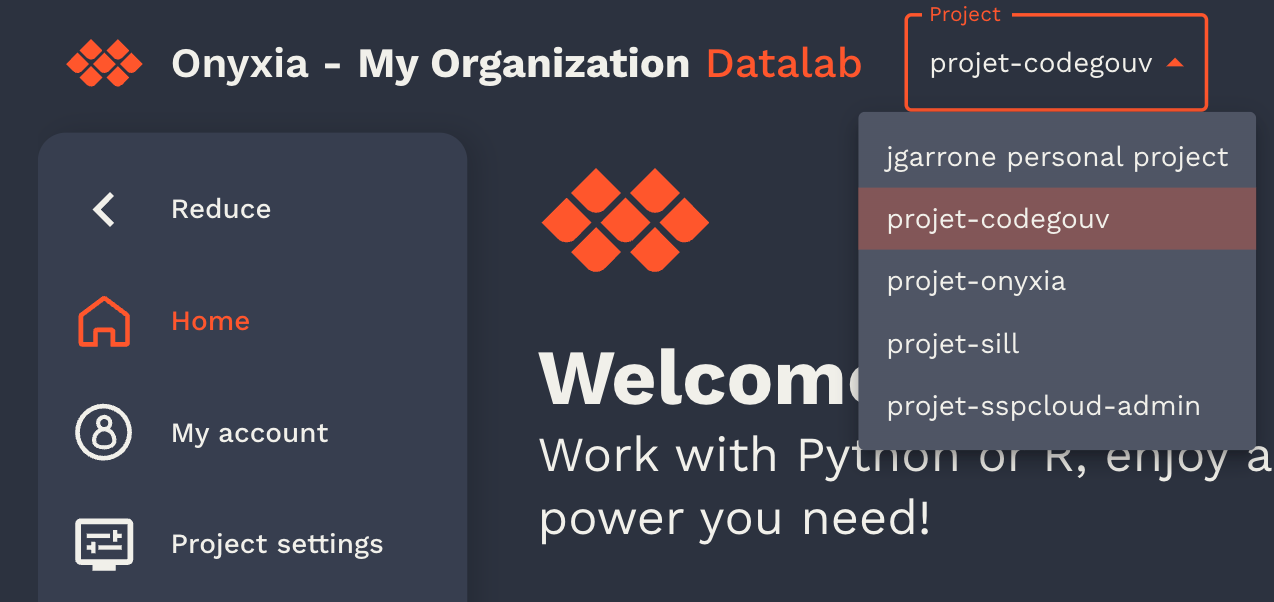
# Navigate to https://onyxia.my-domain.netEnabling a group of users to share the same Kubernetes namespace to work on something together.
Onyxia Project Core Team Future Developments Roadmap
onyxia:
-  serviceAccount:
-    create: true
-    clusterAdmin: true
   api:
+    serviceAccount:
+      create: true
+      clusterAdmin: true
   web:
+    serviceAccount:
+ create: true "nodeSelector": {
"type": "object",
"description": "NodeSelector",
"default": {},
"x-onyxia": {
"hidden": false,
"overwriteDefaultWith": "region.nodeSelector",
"overwriteSchemaWith": "nodeSelector.json"
}
}
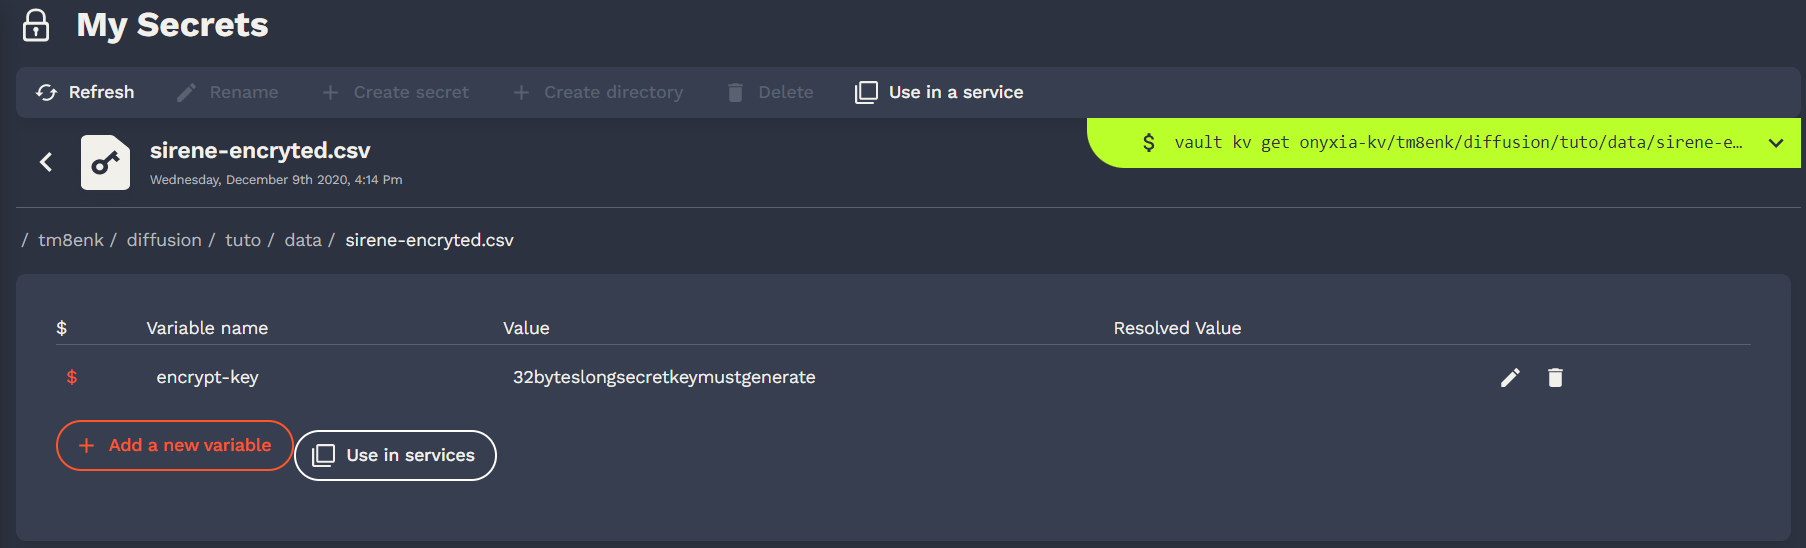
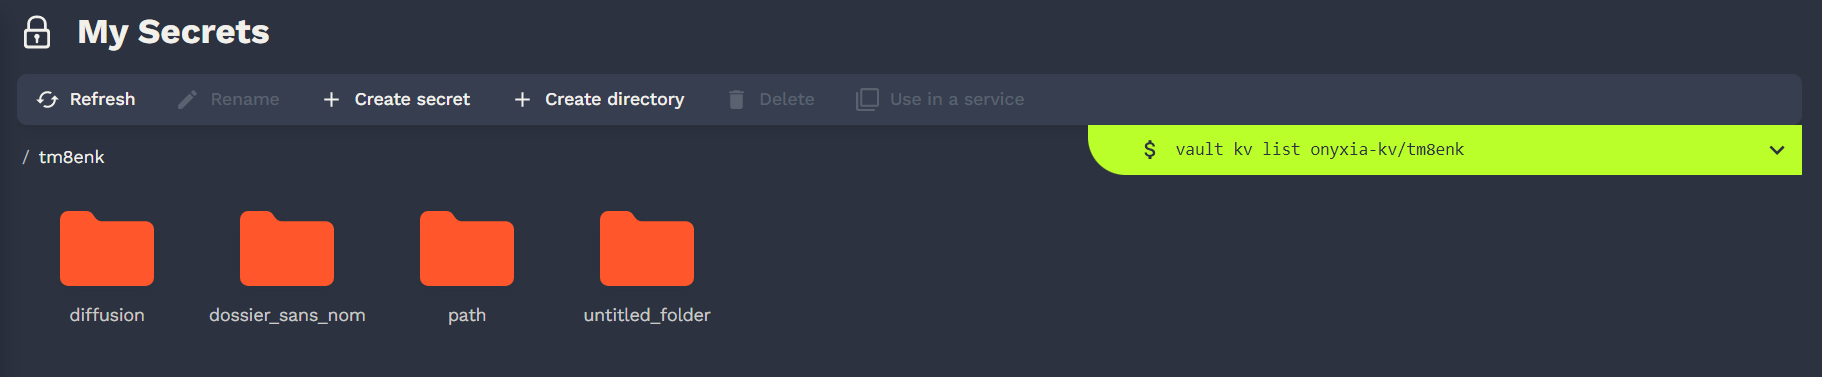
Let's use hashicorp Vault for storing the user secrets.
The TypeScript App that runs in the browser.
helm repo add hashicorp https://helm.releases.hashicorp.com

DOMAIN=my-domain.net

cat << EOF > ./vault-values.yaml
server:
  dev:
    enabled: true
    # Set VAULT_DEV_ROOT_TOKEN_ID value
    devRootToken: "root"
  ingress:
    enabled: true
    annotations:
      kubernetes.io/ingress.class: nginx
    hosts:
      - host: "vault.lab.$DOMAIN"
    tls:
      - hosts:
          - vault.lab.$DOMAIN
EOF

helm install vault hashicorp/vault -f vault-values.yamlgit clone https://github.com/<your-github-org>/onyxia-ops
cd onyxia-ops
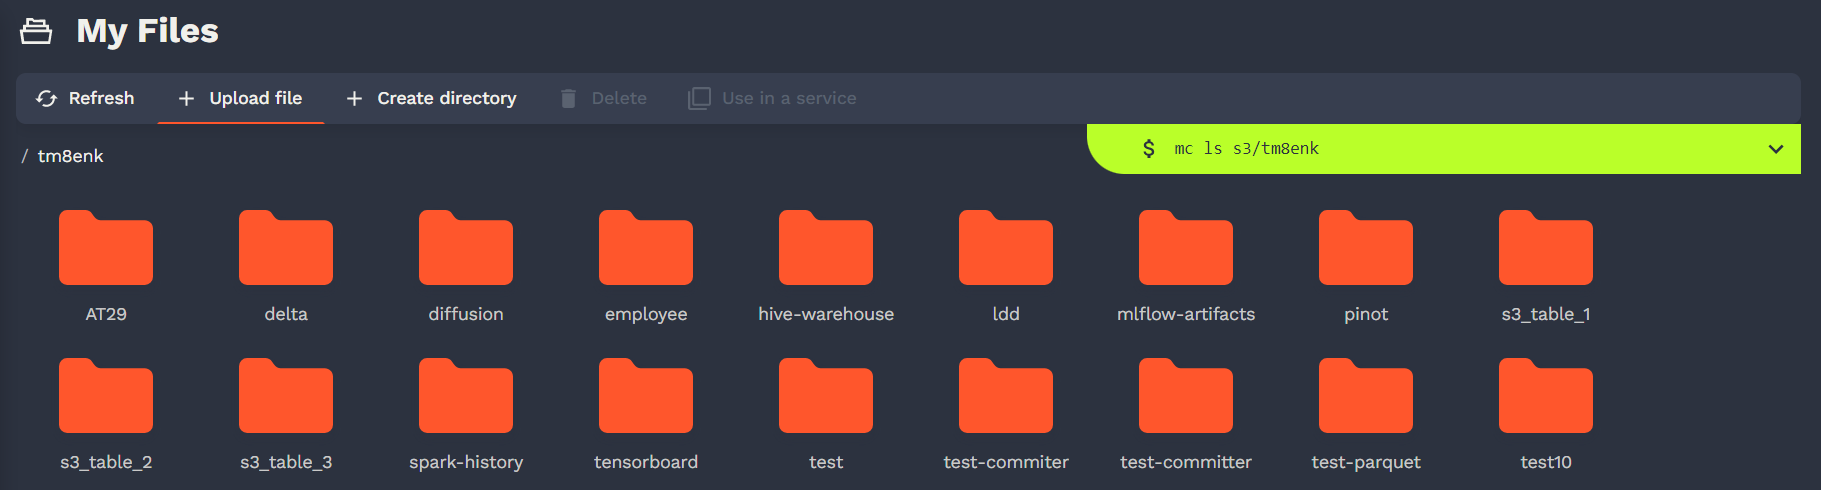
cd apps/minio
# In the values.yaml file replace `$KEYCLOAK_MINIO_CLIENT_SECRET` by the value
# you have copied in the previous step.
git commit -am "Set minio OIDC client secret"
git pushgit clone https://github.com/<your-github-org>/onyxia-ops
cd onyxia-ops
cd apps/onyxia
mv values-minio-enabled.yaml.yaml values.yaml
git commit -am "Enable MinIO"
git push ...
api:
...
regions:
[
{
...
"data": {
"S3": {
- "type": "minio",
"URL": "https://minio.lab.my-domain.net",
"region": "us-east-1",
- "bucketClaim": "preferred_username",
- "defaultDurationSeconds": 86400,
- "oidcConfiguration": {
- "clientID": "onyxia-minio"
- },
+ "sts": {
+ "durationSeconds": 86400,
+ "oidcConfiguration": {
+ "clientID": "onyxia-minio"
+ }
+ },
- "bucketPrefix": "user-",
- "groupBucketPrefix": "projet-",
+ "workingDirectory": {
+ "bucketMode": "multi",
+ "bucketNamePrefix": "user-",
+ "bucketNamePrefixGroup": "projet-"
+ }
},
...
helm upgrade onyxia inseefrlab/onyxia -f onyxia-values.yamlgit clone https://github.com/InseeFrLab/onyxia
cd onyxia/web
yarn install
# To start the app locally
yarn dev
# If you want to test against your own Onyxia instance edit the .env.local.yaml
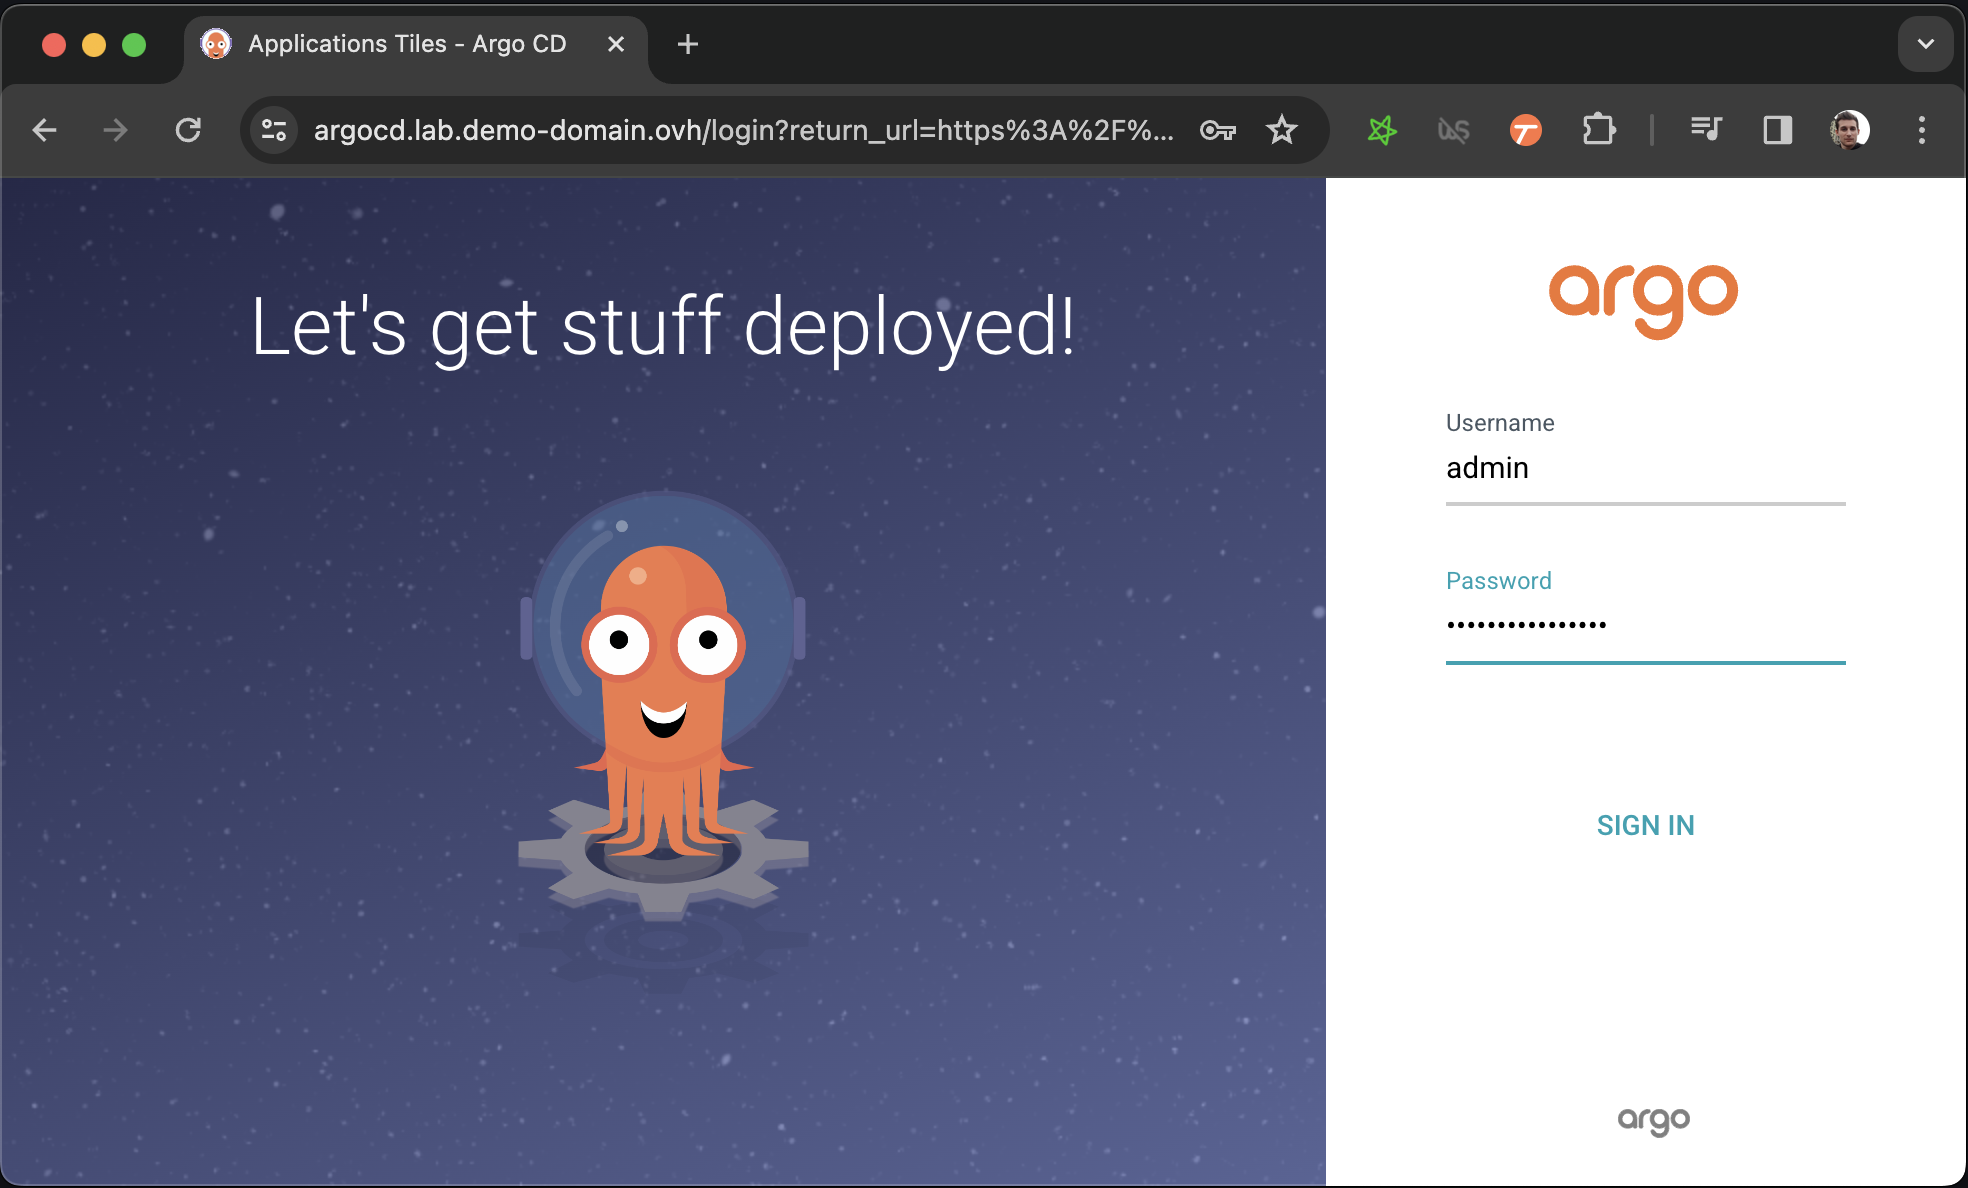
# file (created automatically the first time you run `yarn dev`)Let's install ArgoCD to manage and monitor our Onyxia Datalab deployment!
DOMAIN=my-domain.net

cat << EOF > ./argocd-values.yaml
server:
  extraArgs:
    - --insecure
  ingress:
    #ingressClassName: nginx
    enabled: true
    hostname: argocd.lab.$DOMAIN
    extraTls:
      - hosts:
          - argocd.lab.$DOMAIN
EOF

helm install argocd argo-cd \
  --repo https://argoproj.github.io/argo-helm \
  --version 6.0.9 \
-f ./argocd-values.yamlkubectl get secret argocd-initial-admin-secret \
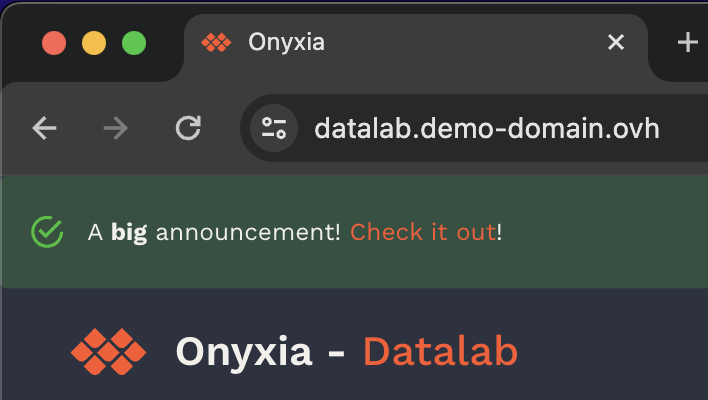
-o jsonpath="{.data.password}" | base64 -d onyxia:
ingress:
enabled: true
hosts:
- host: datalab.demo-domain.ovh
web:
env:
+ GLOBAL_ALERT: |
+ {
+ severity: "success",
+ message: {
+ en: "A **big** announcement! [Check it out](https://example.com)!",
+ fr: "Une annonce **importante**! [Regardez](https://example.com)!"
+ }
+ }
api:
regions: [...] web:
env:
FONT: |
{
fontFamily: "Marianne",
dirUrl: "%PUBLIC_URL%/fonts/Marianne",
"400": "Marianne-Regular.woff2",
"400-italic": "Marianne-Regular_Italic.woff2",
"500": "Marianne-Medium.woff2",
"700": "Marianne-Bold.woff2",
"700-italic": "Marianne-Bold_Italic.woff2"
}
PALETTE_OVERRIDE: |
{
focus: {
main: "#000091",
light: "#9A9AFF",
light2: "#E5E5F4"
},
dark: {
main: "#2A2A2A",
light: "#383838",
greyVariant1: "#161616",
greyVariant2: "#9C9C9C",
greyVariant3: "#CECECE",
greyVariant4: "#E5E5E5"
},
light: {
main: "#F1F0EB",
light: "#FDFDFC",
greyVariant1: "#E6E6E6",
greyVariant2: "#C9C9C9",
greyVariant3: "#9E9E9E",
greyVariant4: "#747474"
}
}
SOCIAL_MEDIA_IMAGE: "%PUBLIC_URL%/preview-france.png"
HOMEPAGE_MAIN_ASSET: "false"web:
env:
FONT: |
{
fontFamily: "Geist",
dirUrl: "%PUBLIC_URL%/fonts/Geist",
"400": "Geist-Regular.woff2",
"500": "Geist-Medium.woff2",
"600": "Geist-SemiBold.woff2",
"700": "Geist-Bold.woff2"
}
PALETTE_OVERRIDE: |
{
focus: {
main: "#067A76",
light: "#0AD6CF",
light2: "#AEE4E3"
},
dark: {
main: "#2D1C3A",
light: "#4A3957",
greyVariant1: "#22122E",
greyVariant2: "#493E51",
greyVariant3: "#918A98",
greyVariant4: "#C0B8C6"
},
light: {
main: "#F7F5F4",
light: "#FDFDFC",
greyVariant1: "#E6E6E6",
greyVariant2: "#C9C9C9",
greyVariant3: "#9E9E9E",
greyVariant4: "#747474"
}
}
SOCIAL_MEDIA_IMAGE: "%PUBLIC_URL%/preview-ultraviolet.png"-helm repo add inseefrlab https://inseefrlab.github.io/helm-charts
+helm repo add onyxia https://inseefrlab.github.io/onyxia
-helm install onyxia inseefrlab/helm-charts
+helm install onyxia onyxia/onyxia apiVersion: v2
name: onyxia
version: 1.0.0
dependencies:
- name: onyxia
- version: 4.1.0
+ version: 4.1.4
- repository: https://inseefrlab.github.io/helm-charts/
+ repository: https://inseefrlab.github.io/onyxia/helm repo add onyxia https://inseefrlab.github.io/onyxia
DOMAIN=my-domain.net
cat << EOF > ./onyxia-values.yaml
# ...
web:
image:
- tag: 2.29.4
api:
image:
- tag: v0.32
# ...
EOF
helm install onyxia onyxia/onyxia -f onyxia-values.yamlhelm repo add codecentric https://codecentric.github.io/helm-charts
cat << EOF > ./keycloak-values.yaml
# ... See https://docs.onyxia.sh/#enabling-user-authentication
extraInitContainers: |
- name: realm-ext-provider
image: curlimages/curl
imagePullPolicy: IfNotPresent
command:
- sh
args:
- -c
- |
- curl -L -f -S -o /extensions/onyxia.jar https://github.com/InseeFrLab/onyxia/releases/download/v2.29.4/keycloak-theme.jar
+ curl -L -f -S -o /extensions/onyxia.jar https://github.com/InseeFrLab/onyxia/releases/download/v4.1.4/keycloak-theme.jar
volumeMounts:
- name: extensions
mountPath: /extensions
extraVolumeMounts: |
- name: extensions
mountPath: /opt/jboss/keycloak/standalone/deployments
extraVolumes: |
- name: extensions
emptyDir: {}
# ...
EOF
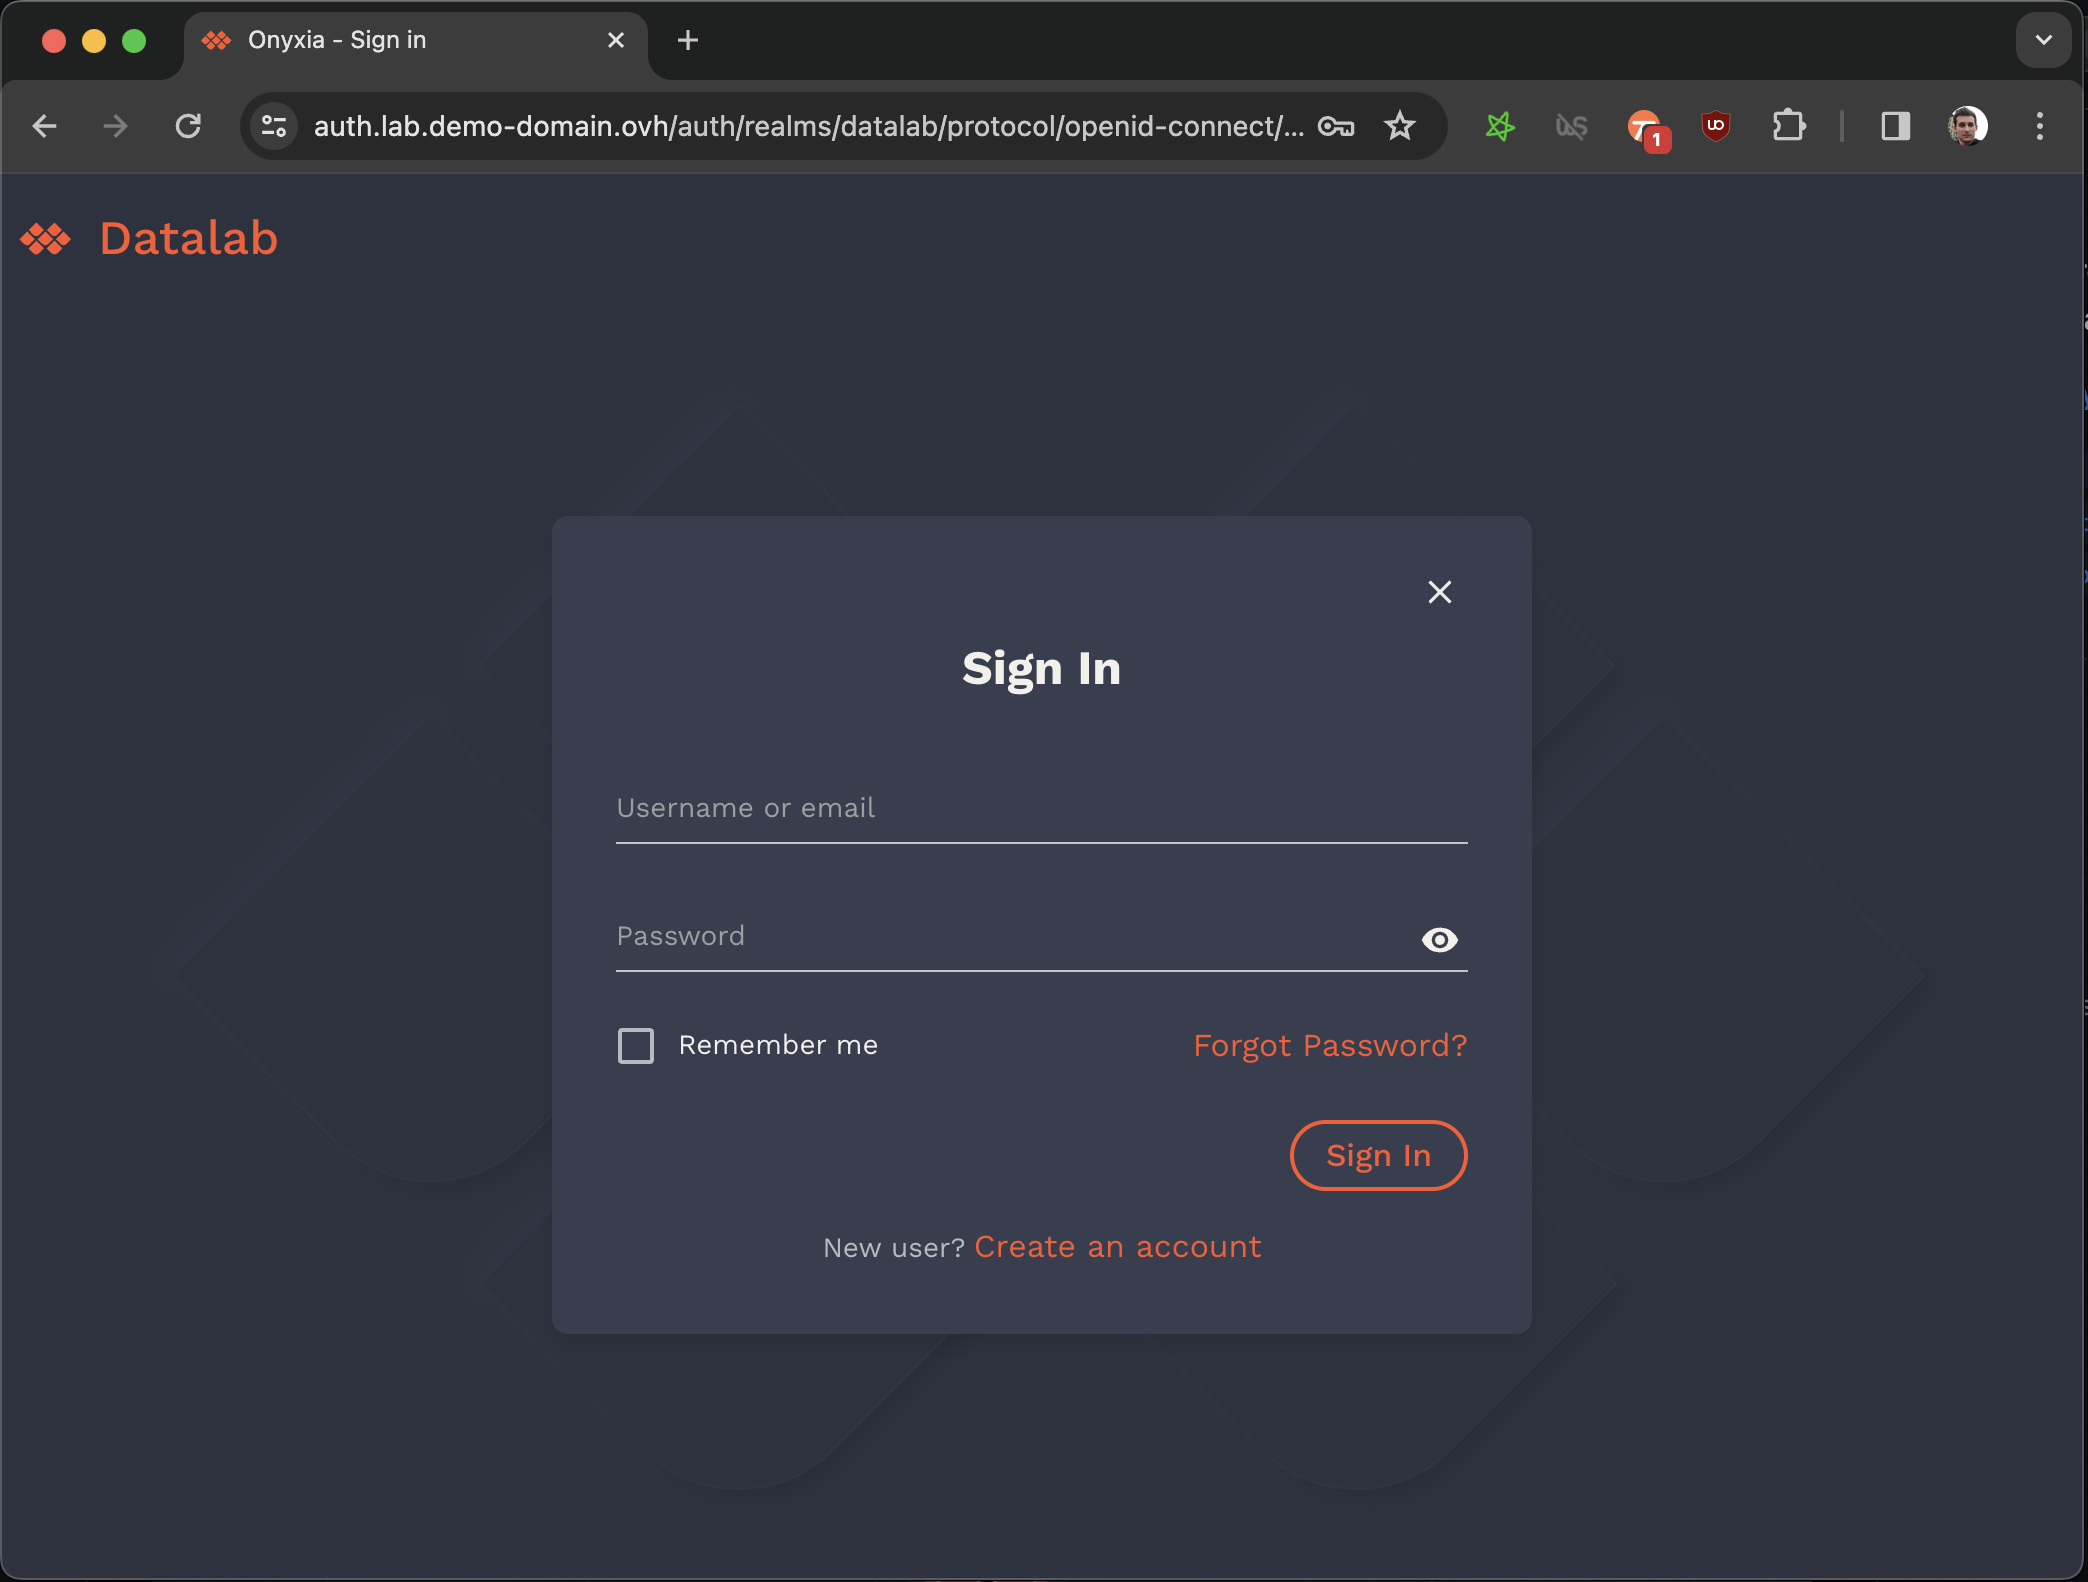
helm install keycloak codecentric/keycloak -f keycloak-values.yamlUsing Onyxia (as a data scientist)
{
  "attributes": [
    {
      "name": "username",
      "displayName": "${username}",
      "validations": {
        "length": {
          "min": 3,
          "max": 255
        },
+       "pattern": {
+         "error-message": "${lowerCaseAlphanumericalCharsOnly}",
+         "pattern": "^[a-z0-9]*$"
+       },
        "username-prohibited-characters": {}
      }
    },
    {
      "name": "email",
      "displayName": "${email}",
      "validations": {
        "email": {},
+       "pattern": {
+         "pattern": "^[^@]+@([^.]+\\.)*((gmail\\.com)|(hotmail\\.com))$"
+       },
        "length": {
          "max": 255
        }
      }
    },
...git clone https://github.com/<your-github-org>/onyxia-ops
cd onyxia-ops
cd apps/onyxia
mv values-keycloak-enabled.yaml values.yaml
git commit -am "Enable keycloak"
git pushsrc/core contains the 🧠 of the app. web:
env:
MINIO_URL: https://minio.lab.sspcloud.fr
VAULT_URL: https://vault.lab.sspcloud.fr
OIDC_URL: https://auth.lab.sspcloud.fr/auth
OIDC_REALM: sspcloud
TITLE: SSP Cloud
ORG_NAME: InseeFrLab #<==========
france theme:onyxia:
web:
env:
- KEYCLOAK_URL: https://auth.lab.sspcloud.fr/auth
- KEYCLOAK_REALM: sspcloud
api:
env:
- keycloak.resource: onyxia
- keycloak.realm: sspcloud
- keycloak.auth-server-url: https://auth.lab.sspcloud.fr/auth
- keycloak.ssl-required: external
- keycloak.public-client: "true"
- keycloak.enable-basic-auth: "true"
- keycloak.bearer-only: "true"
+ oidc.issuer-uri: "https://auth.lab.sspcloud.fr/auth/realms/sspcloud"
+ oidc.clientID: "onyxia"
+ oidc.audience: "onyxia"
authentication.mode: "openidconnect"
regions:
[
{
"id": "paris",
"services": {
- "authenticationMode": "admin",
+ "authenticationMode": "serviceAccount",
"k8sPublicEndpoint": {
"URL": "https://apiserver.kub.sspcloud.fr",
- "keycloakParams": {
- "URL": "https://auth.lab.sspcloud.fr/auth",
- "realm": "sspcloud",
- "clientId": "onyxia"
- },
+ "oidcConfiguration": {
+ "issuerURI": "https://auth.lab.sspcloud.fr/auth/realms/sspcloud",
+ "clientID": "onyxia-k8s-apiserver",
+ }
}
},
"data": {
"S3": {
- "keycloakParams": {
- "URL": "https://auth.lab.sspcloud.fr/auth",
- "realm": "sspcloud",
- "clientId": "onyxia-minio",
- }
+ "oidcConfiguration": {
+ "issuerURI": "https://auth.lab.sspcloud.fr/auth/realms/sspcloud",
+ "clientID": "onyxia-minio",
+ }
}
},
"vault": {
"URL": "https://vault.lab.sspcloud.fr",
- "keycloakParams": {
- "URL": "https://auth.lab.sspcloud.fr/auth",
- "realm": "sspcloud",
- "clientId": "onyxia-vault",
- }
+ "oidcConfiguration": {
+ "issuerURI": "https://auth.lab.sspcloud.fr/auth/realms/sspcloud",
+ "clientID": "onyxia-vault"
+ }
}
}
] onyxia:
web:
env:
- THEME_ID: france
+ FONT: |
+ {
+ fontFamily: "Marianne",
+ dirUrl: "%PUBLIC_URL%/fonts/Marianne",
+ "400": "Marianne-Regular.woff2",
+ "400-italic": "Marianne-Regular_Italic.woff2",
+ "500": "Marianne-Medium.woff2",
+ "700": "Marianne-Bold.woff2",
+ "700-italic": "Marianne-Bold_Italic.woff2"
+ }
+ PALETTE_OVERRIDE: |
+ {
+ focus: {
+ main: "#000091",
+ light: "#9A9AFF",
+ light2: "#E5E5F4"
+ },
+ dark: {
+ main: "#2A2A2A",
+ light: "#383838",
+ greyVariant1: "#161616",
+ greyVariant2: "#9C9C9C",
+ greyVariant3: "#CECECE",
+ greyVariant4: "#E5E5E5"
+ },
+ light: {
+ main: "#F1F0EB",
+ light: "#FDFDFC",
+ greyVariant1: "#E6E6E6",
+ greyVariant2: "#C9C9C9",
+ greyVariant3: "#9E9E9E",
+ greyVariant4: "#747474"
+ }
+ }
+ SOCIAL_MEDIA_IMAGE: "%PUBLIC_URL%/preview-france.png" onyxia:
web:
env:
- THEME_ID: ultraviolet
+ PALETTE_OVERRIDE: |
+ {
+ focus: {
+ main: "#067A76",
+ light: "#0AD6CF",
+ light2: "#AEE4E3"
+ },
+ dark: {
+ main: "#2D1C3A",
+ light: "#4A3957",
+ greyVariant1: "#22122E",
+ greyVariant2: "#493E51",
+ greyVariant3: "#918A98",
+ greyVariant4: "#C0B8C6"
+ },
+ light: {
+ main: "#F7F5F4",
+ light: "#FDFDFC",
+ greyVariant1: "#E6E6E6",
+ greyVariant2: "#C9C9C9",
+ greyVariant3: "#9E9E9E",
+ greyVariant4: "#747474"
+ }
+ }
+ SOCIAL_MEDIA_IMAGE: "%PUBLIC_URL%/preview-ultraviolet.png" onyxia:
web:
env:
- THEME_ID: verdant
+ PALETTE_OVERRIDE: |
+ focus: {
+ main: "#1F8D49",
+ light: "#4EFB8D",
+ light2: "#DFFEE6"
+ },
+ light: {
+ main: "#F4F6FF",
+ light: "#F6F6F6",
+ greyVariant1: "#E6E6E6",
+ greyVariant2: "#C9C9C9",
+ greyVariant3: "#9E9E9E",
+ greyVariant4: "#747474"
+ } onyxia:
web:
env:
- HEADER_ORGANIZATION: SSP Cloud
+ HEADER_TEXT_BOLD: SSP Cloud
- HEADER_USECASE_DESCRIPTION: Datalab
+ HEADER_TEXT_FOCUS: Datalab
- DESCRIPTION: Shared platform for statistical data processing and data science services
+ SOCIAL_MEDIA_DESCRIPTION: Shared platform for statistical data processing and data science services
+ SOCIAL_MEDIA_TITLE: Datalab - SSP Cloud onyxia:
web:
env:
- EXTRA_LEFTBAR_ITEMS: |
+ LEFTBAR_LINKS: |isUserLoggedIn is not a constant!const { isUserLoggedIn } = useCoreState(state => state.userAuthentication);const { userAuthenticationThunks } = useThunks();
const isUserLoggedIn = userAuthenticationThunks.getIsUserLoggedIn();Provision a Kubernetes cluster
kubectl apply -f https://raw.githubusercontent.com/kubernetes/ingress-nginx/controller-v1.2.0/deploy/static/provider/aws/deploy.yamlkubectl get services -n ingress-nginxdatalab.my-domain.net CNAME xxx.elb.eu-west-1.amazonaws.com.
*.lab.my-domain.net CNAME xxx.elb.eu-west-1.amazonaws.com. brew install certbot #On Mac, lookup how to install certbot for your OS
#Because we need a wildcard certificate we have to complete the DNS callange.
sudo certbot certonly --manual --preferred-challenges dns
# When asked for the domains you wish to optains a certificate for enter:
# datalab.my-domain.net *.lab.my-domain.netDOMAIN=my-domain.net
sudo kubectl create secret tls onyxia-tls \
-n ingress-nginx \
--key /etc/letsencrypt/live/datalab.$DOMAIN/privkey.pem \
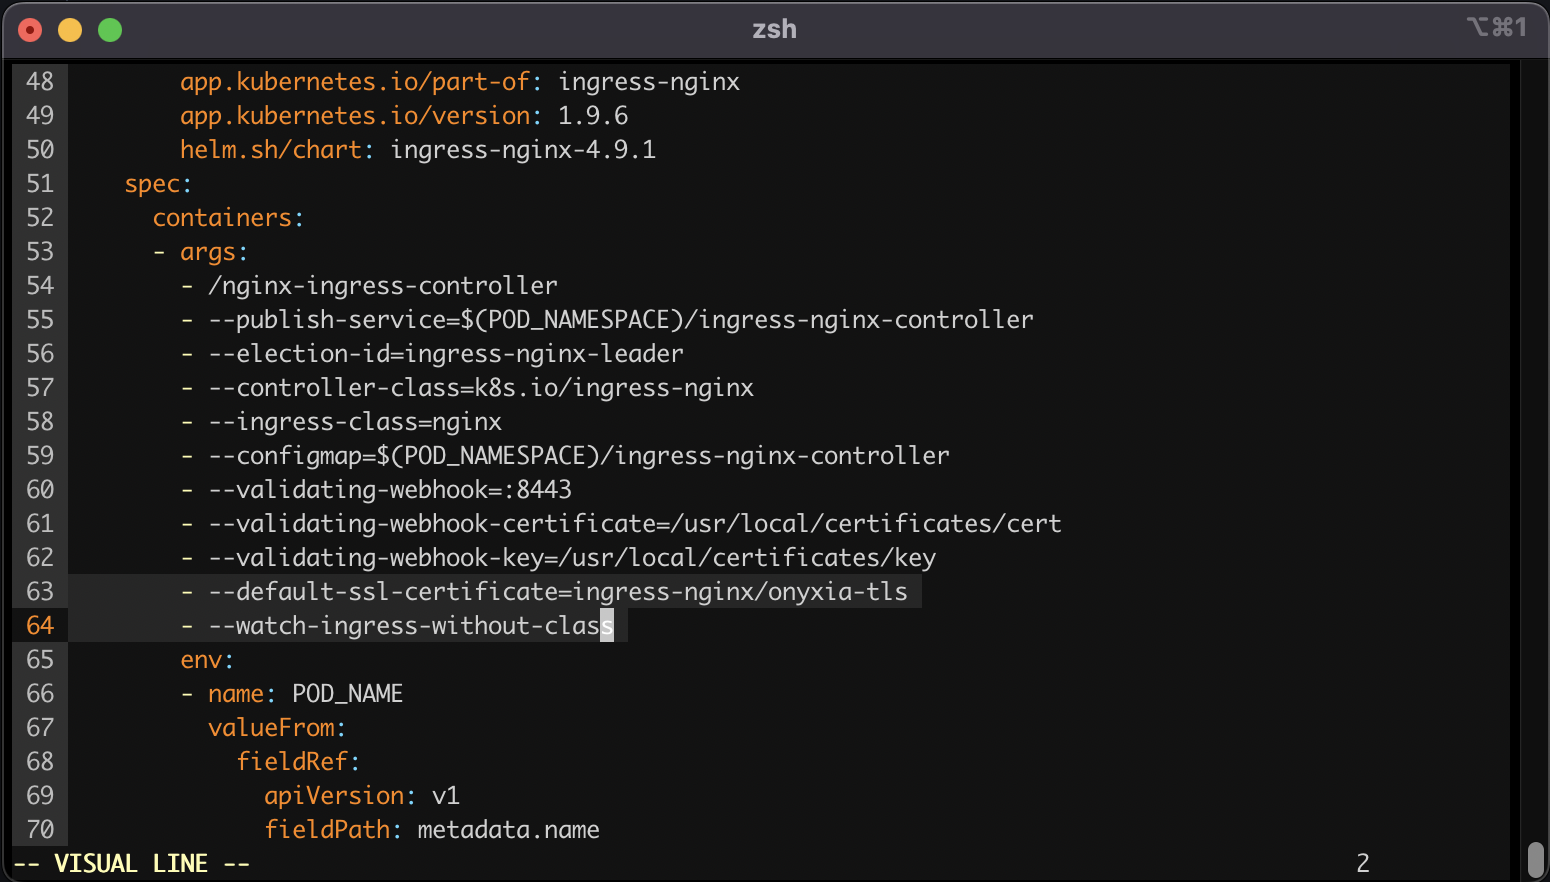
--cert /etc/letsencrypt/live/datalab.$DOMAIN/fullchain.pemkubectl edit deployment ingress-nginx-controller -n ingress-nginx - --default-ssl-certificate=ingress-nginx/onyxia-tls
- --watch-ingress-without-classdatalab.my-domain.net A <YOUR_IP>
*.lab.my-domain.net A <YOUR_IP>brew install certbot #On Mac, lookup how to install certbot for your OS
# Because we need a wildcard certificate we have to complete the DNS callange.
sudo certbot certonly --manual --preferred-challenges dns
# When asked for the domains you wish to optains a certificate for enter:
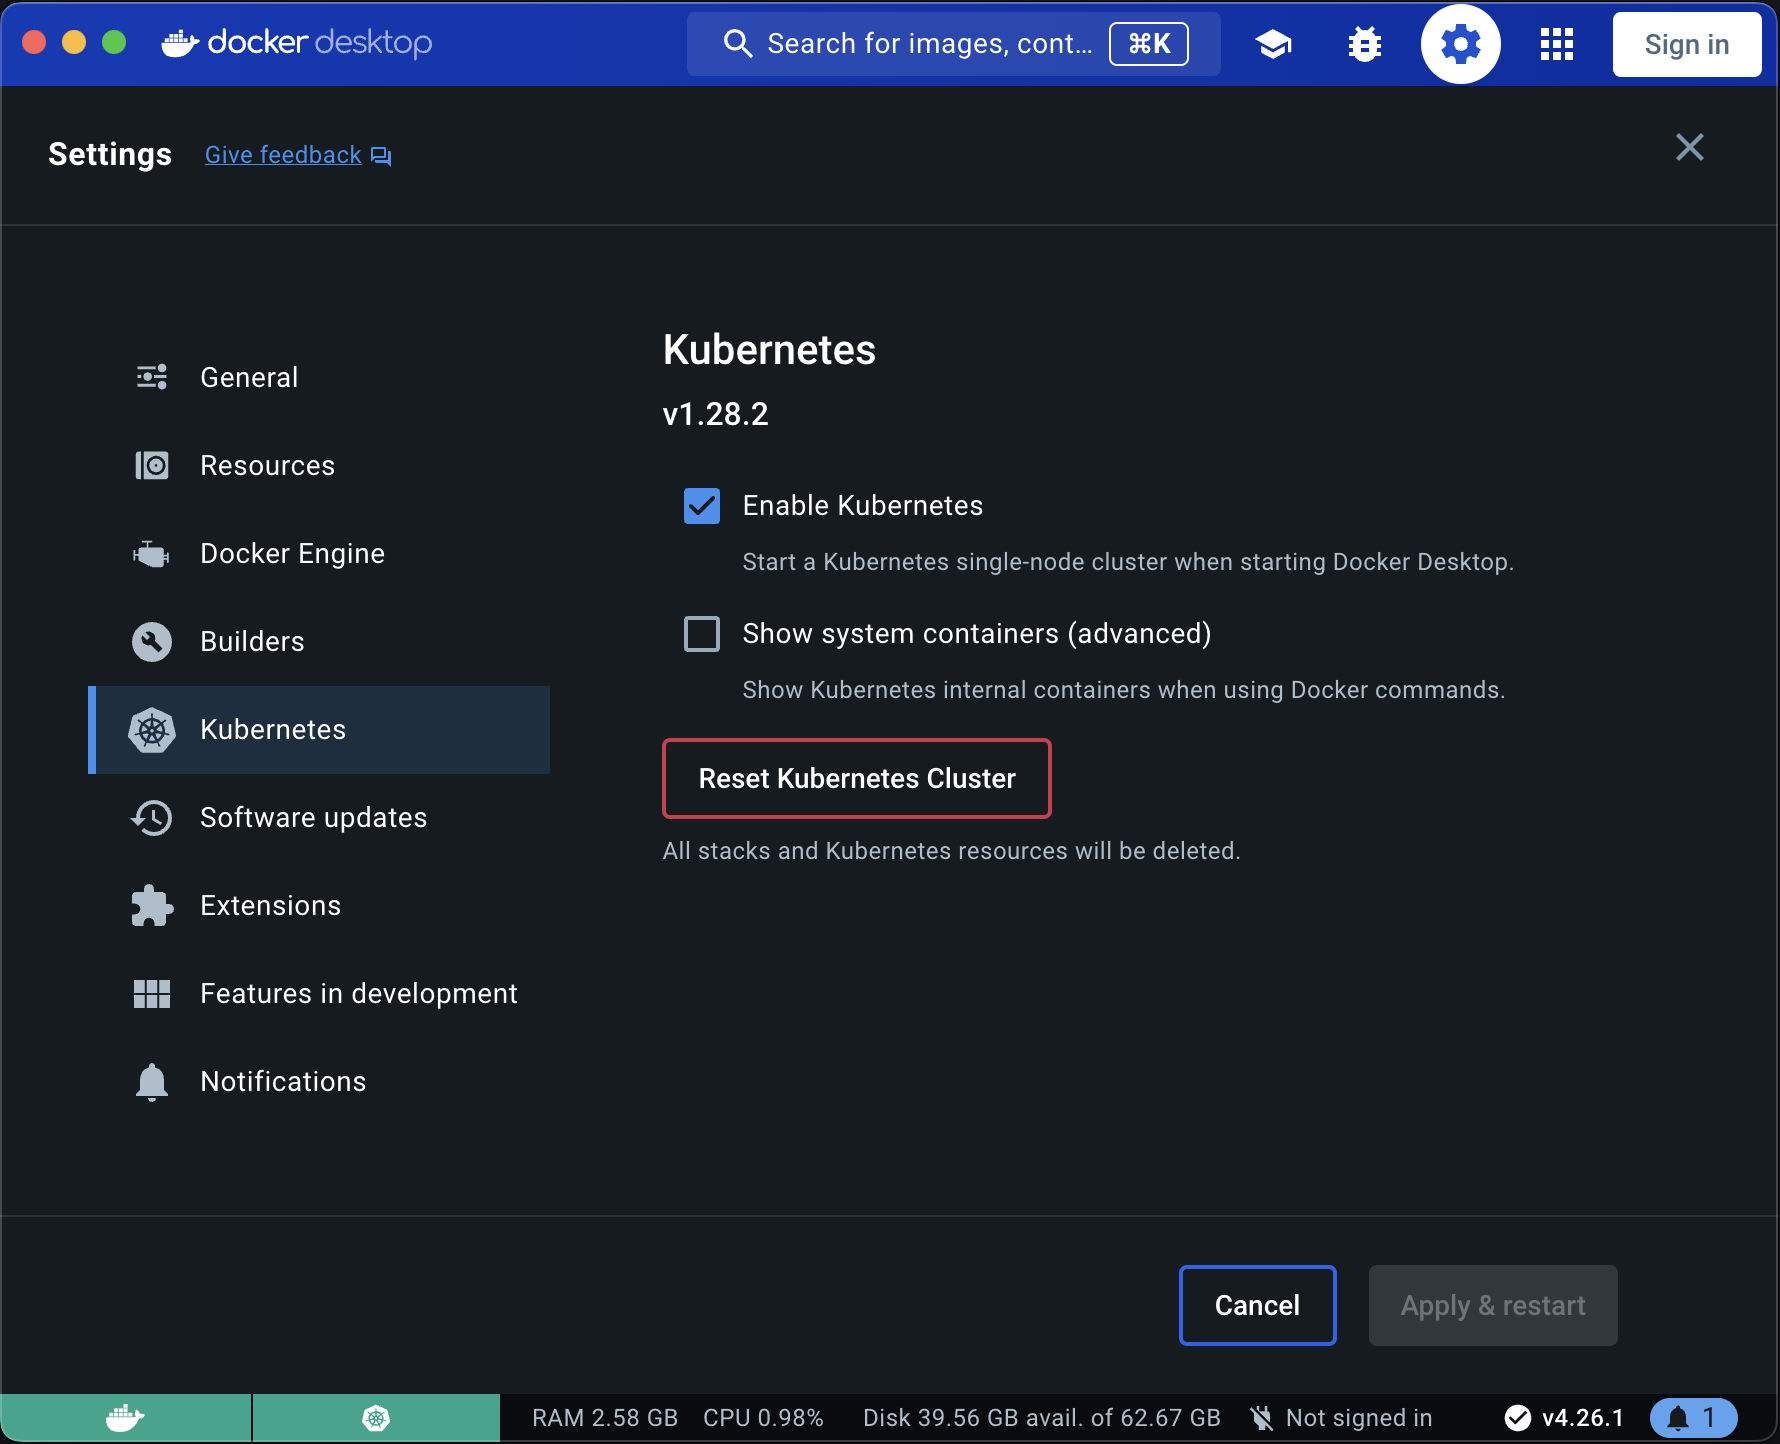
# datalab.my-domain.net *.lab.my-domain.net# First let's make sure we connect to our local Kube cluser
kubectl config use-context docker-desktop
kubectl create namespace ingress-nginx
DOMAIN=my-domain.net
sudo kubectl create secret tls onyxia-tls \
    -n ingress-nginx \
    --key /etc/letsencrypt/live/datalab.$DOMAIN/privkey.pem \
--cert /etc/letsencrypt/live/datalab.$DOMAIN/fullchain.pemcat << EOF > ./ingress-nginx-values.yaml
controller:
extraArgs:
default-ssl-certificate: "ingress-nginx/onyxia-tls"
watchIngressWithoutClass: true
EOF
helm install ingress-nginx ingress-nginx \
--repo https://kubernetes.github.io/ingress-nginx \
--version 4.9.1 \
--namespace ingress-nginx \
-f ./ingress-nginx-values.yaml
datalab.my-domain.net CNAME jhon-doe-home.ddns.net.
*.lab.my-domain.net   CNAME jhon-doe-home.ddnc.net.
Technologies at play in Onyxia-web
bottommargincd ~/github
git clone https//github.com/InseeFrLab/onyxia
cd onyxia/web
yarn install
cd ~/github/onyxia #This is just a suggestion, clone wherever you see fit.
git clone https://github.com/InseeFrLab/onyxia-ui ui
cd ui
yarn install
yarn build
yarn link-in-web
npx tsc -w
# Open a new terminal
cd ~/github/onyxia/web
yarn start
yarn storybookdocker run --env OIDC_URL="https://url-of-our-keycloak.fr/auth" InseeFrLab/onyxia-web web:
replicaCount: 2
env:
MINIO_URL: https://minio.lab.sspcloud.fr
VAULT_URL: https://vault.lab.sspcloud.fr
OIDC_URL: https://auth.lab.sspcloud.fr/auth
OIDC_REALM: sspcloud
TITLE: SSP Cloud
Unserstand how Onyxia catalogs work and potentially create your own!
onyxia:
web:
# ...
api:
# ...
catalogs: [
{
type: "helm",
id: "aerospace",
# The url of the Helm chart repository
location: "https://myorg.github.io/helm-charts-aerospace/",
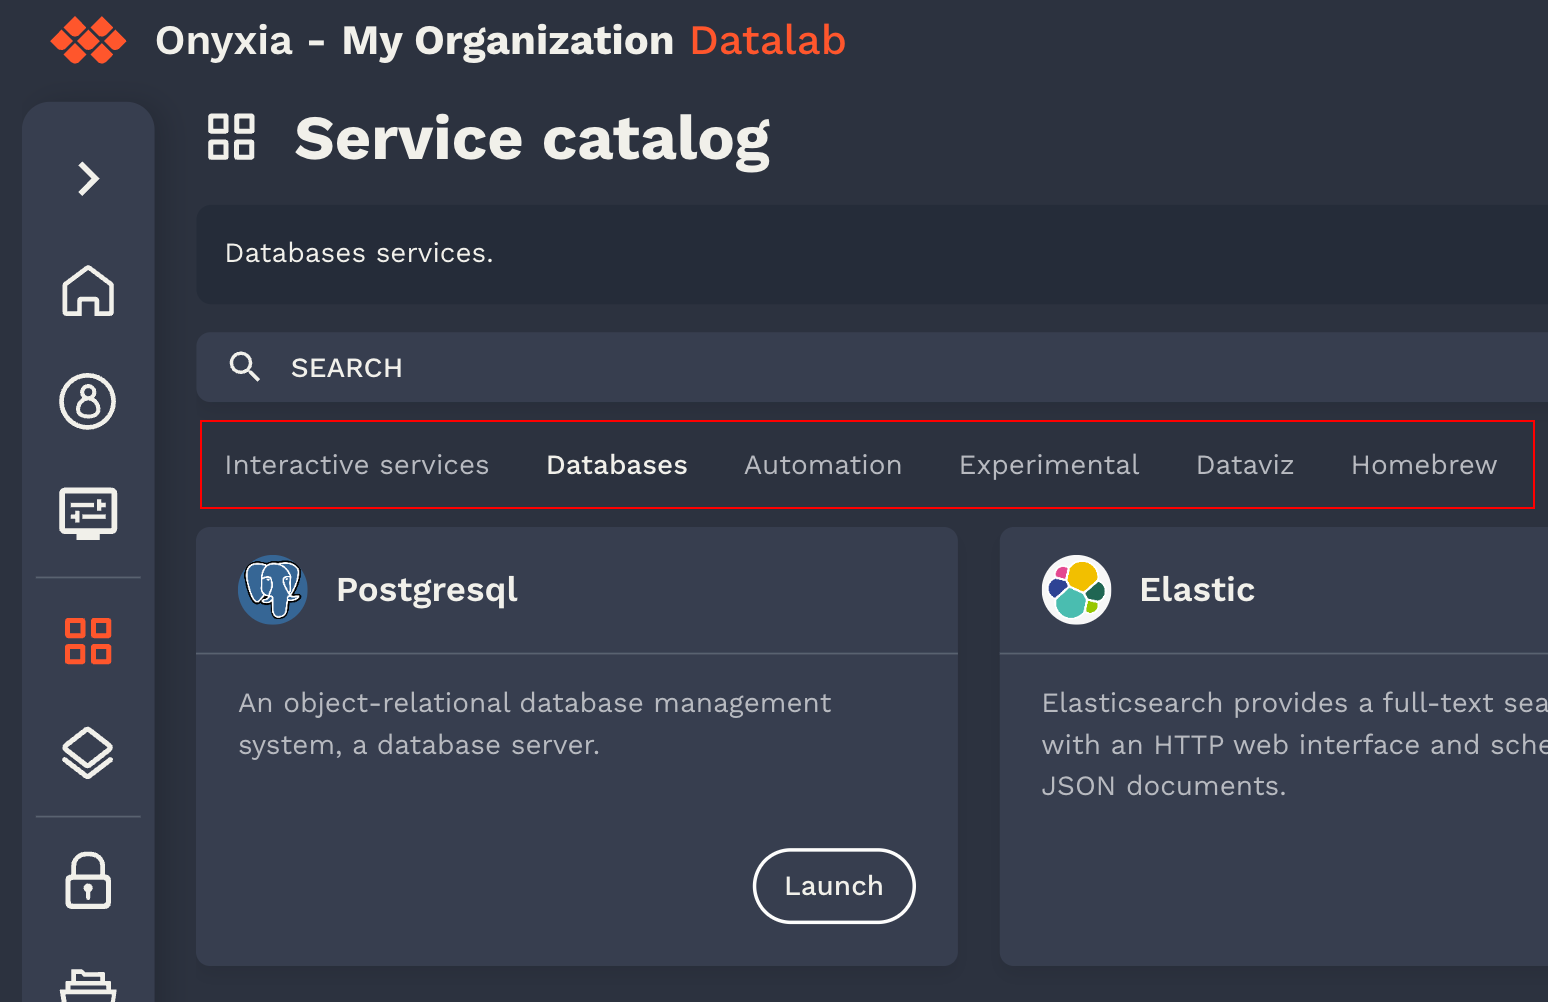
# Display under the search bar as selection tab:
# https://github.com/InseeFrLab/onyxia/assets/6702424/a7247c7d-b0be-48db-893b-20c9352fdb94
name: {
en: "Aerospace services",
fr: "Services aérospatiaux"
# ... other languages your instance supports
},
# Optional. Defines the chart that should appear first
highlightedCharts: ["jupyter-artemis", "rstudio-dragonfly"],
# Optional. Defines the chart that should be excluded
excludedCharts: ["a-vendor-locking-chart"],
# Optional, If defined, displayed in the header of the catalog page:
# https://github.com/InseeFrLab/onyxia/assets/6702424/57e32f44-b889-41b2-b0c7-727c35b07650
# Is rendered as Markdown
description: {
en: "A catalog of services for aerospace engineers",
fr: "Un catalogue de services pour les ingénieurs aérospatiaux"
# ...
},
# Can be "PROD" or "TEST". If test the catalogs will be accessible if you type the url in the search bar
# but you won't have a tab to select it.
status": "PROD",
# Optional. If true the certificate verification for `${location}/index.yaml` will be skipped.
skipTlsVerify: false,
# Optional. certificate authority file to use for the TLS verification
caFile: "/path/to/ca.crt",
# Optional: Enables you to a specific group of users.
# You can match any claim in the JWT token.
# If the claim's value is an array, it match if one of the value is the one you specified.
# The match property can also be a regex.
restrictions: [
{
userAttribute: {
key: "groups",
matches: "nasa-engineers"
}
}
]
},
# { ... } another catalog
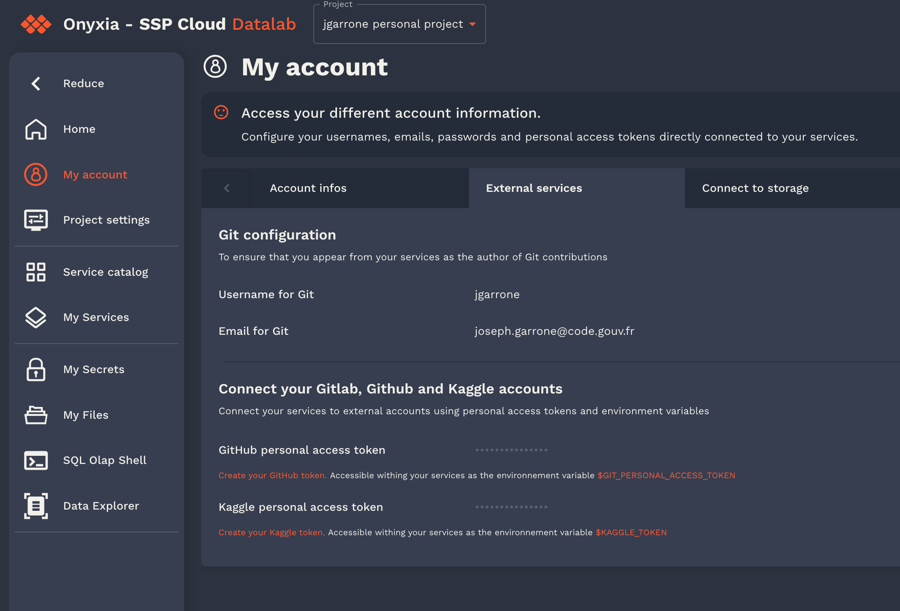
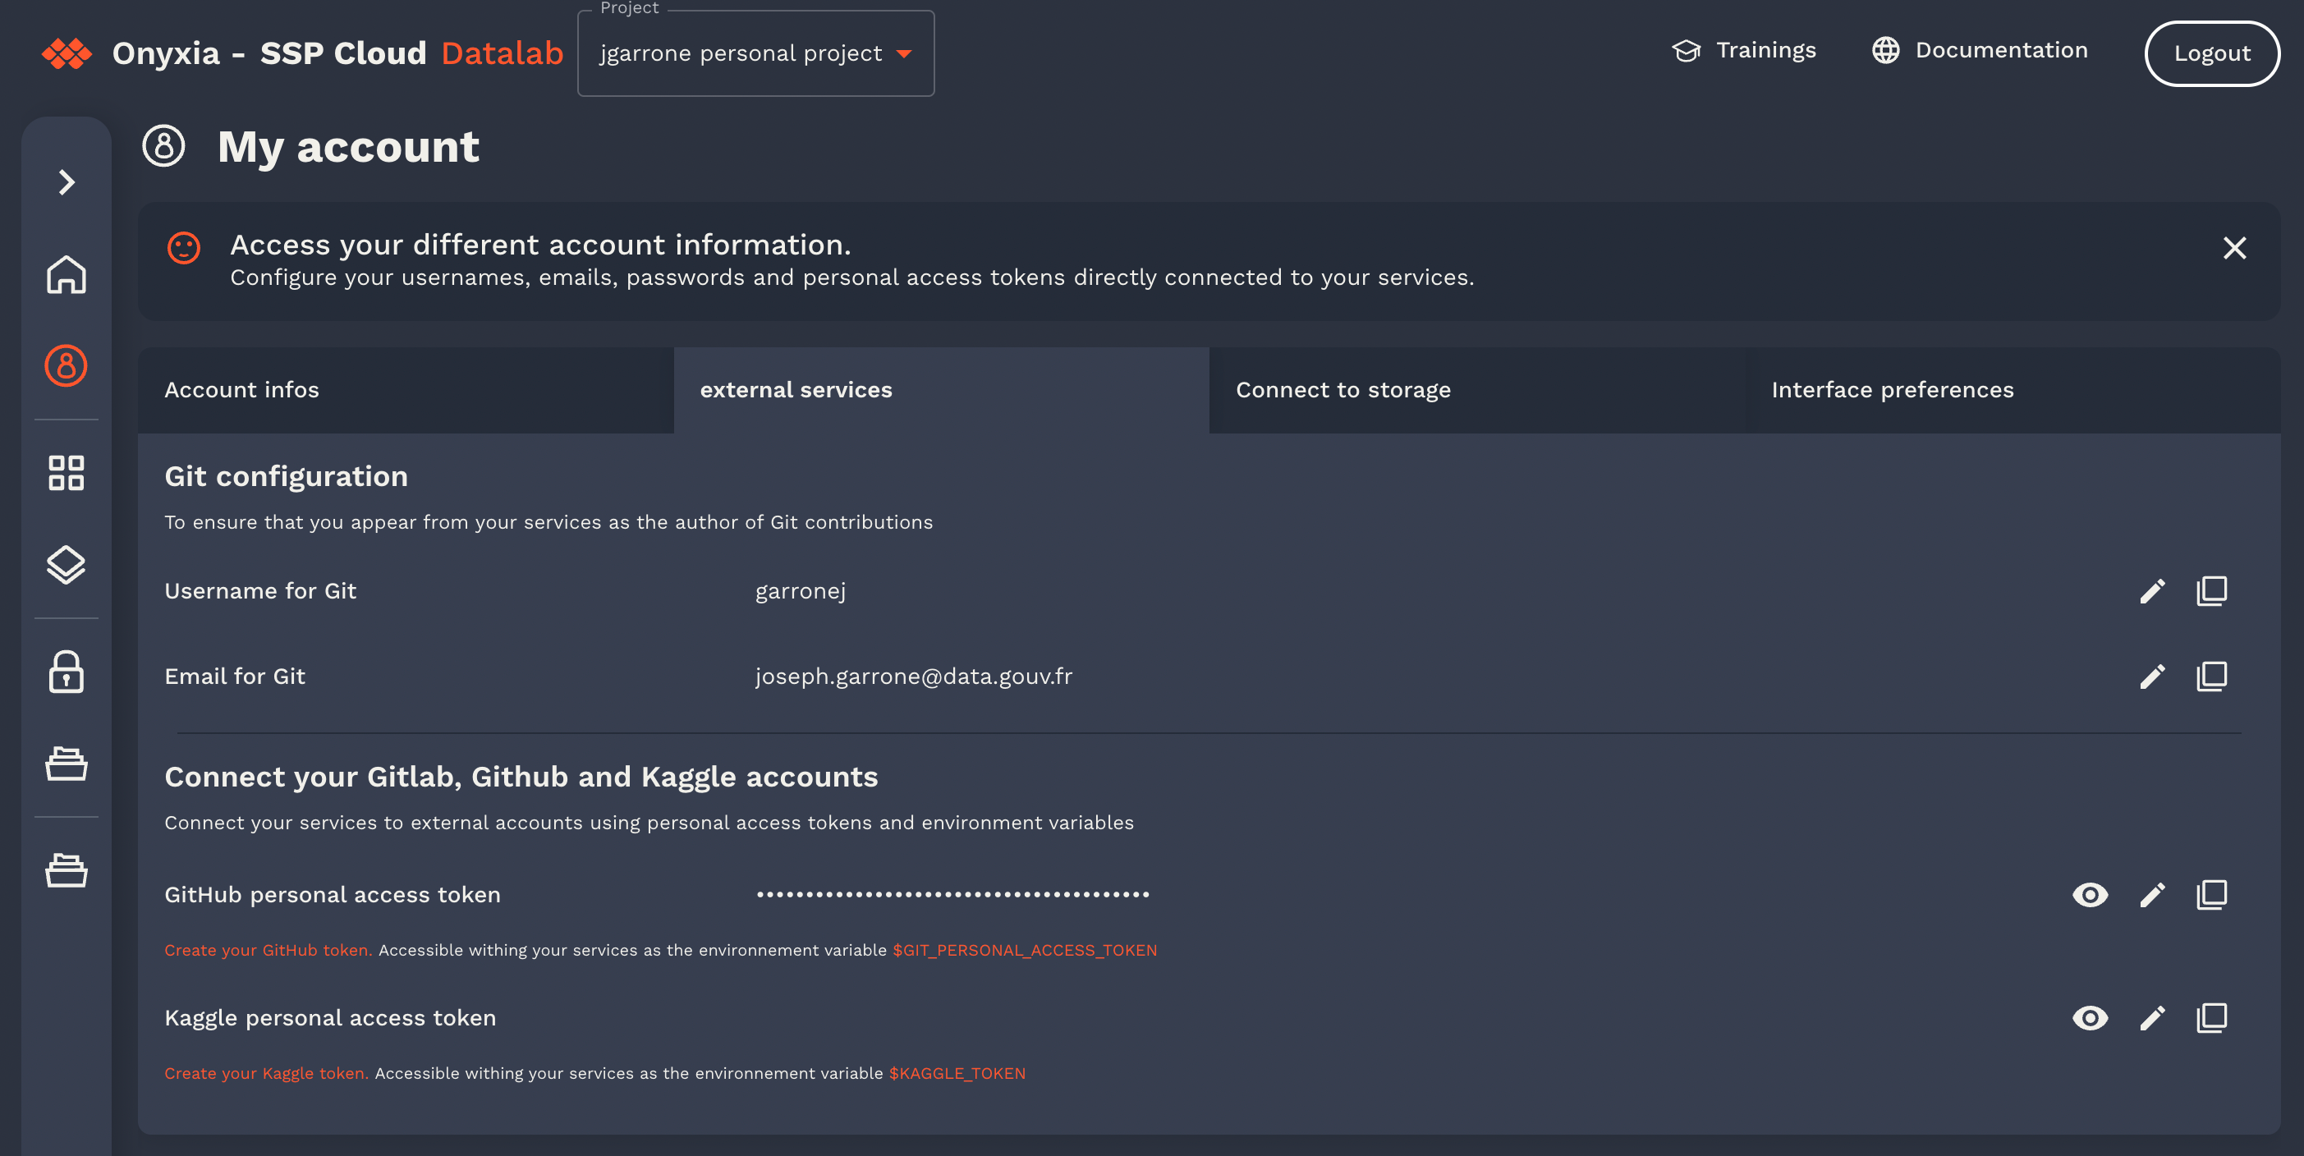
]"git": {
"description": "Git user configuration",
"type": "object",
"properties": {
"enabled": {
"type": "boolean",
"description": "Add git config inside your environment",
"default": true
},
"name": {
"type": "string",
"description": "user name for git",
"default": "",
"x-onyxia": {
"overwriteDefaultWith": "git.name"
},
"hidden": {
"value": false,
"path": "git/enabled"
}
},
"email": {
"type": "string",
"description": "user email for git",
"default": "",
"x-onyxia": {
"overwriteDefaultWith": "git.email"
},
"hidden": {
"value": false,
"path": "git/enabled"
}
},
"cache": {
"type": "string",
"description": "duration in seconds of the credentials cache duration",
"default": "",
"x-onyxia": {
"overwriteDefaultWith": "git.credentials_cache_duration"
},
"hidden": {
"value": false,
"path": "git/enabled"
}
},
"token": {
"type": "string",
"description": "personal access token",
"default": "",
"x-onyxia": {
"overwriteDefaultWith": "git.token"
},
"hidden": {
"value": false,
"path": "git/enabled"
}
},
"repository": {
"type": "string",
"description": "Repository url",
"default": "",
"hidden": {
"value": false,
"path": "git/enabled"
}
},
"branch": {
"type": "string",
"description": "Brach automatically checkout",
"default": "",
"hidden": {
"value": "",
"path": "git/repository"
}
}
}
},export type XOnyxiaParams = {
/**
* This is where you can reference values from the onyxia context so that they
* are dynamically injected by the Onyxia launcher.
*
* Examples:
* "overwriteDefaultWith": "user.email" ( You can also write "{{user.email}}" it's equivalent )
* "overwriteDefaultWith": "{{project.id}}-{{k8s.randomSubdomain}}.{{k8s.domain}}"
* "overwriteDefaultWith": [ "a hardcoded value", "some other hardcoded value", "{{region.oauth2.clientId}}" ]
* "overwriteDefaultWith": { "foo": "bar", "bar": "{{region.oauth2.clientId}}" }
*
*/
overwriteDefaultWith?:
| string
| number
| boolean
| unknown[]
| Record<string, unknown>;
overwriteListEnumWith?: unknown[] | string;
hidden?: boolean;
readonly?: boolean;
useRegionSliderConfig?: string;
};
export type XOnyxiaContext = {
user: {
idep: string;
name: string;
email: string;
password: string;
ip: string;
darkMode: boolean;
lang: "en" | "fr" | "zh-CN" | "no" | "fi" | "nl" | "it" | "es" | "de";
/**
* Decoded JWT OIDC ID token of the user launching the service.
*
* Sample value:
* {
* "sub": "9000ffa3-5fb8-45b5-88e4-e2e869ba3cfa",
* "name": "Joseph Garrone",
* "aud": ["onyxia", "minio-datanode"],
* "groups": [
* "USER_ONYXIA",
* "codegouv",
* "onyxia",
* "sspcloud-admin",
* ],
* "preferred_username": "jgarrone",
* "given_name": "Joseph",
* "locale": "en",
* "family_name": "Garrone",
* "email": "[email protected]",
* "policy": "stsonly",
* "typ": "ID",
* "azp": "onyxia",
* "email_verified": true,
* "realm_access": {
* "roles": ["offline_access", "uma_authorization", "default-roles-sspcloud"]
* }
* }
*/
decodedIdToken: Record<string, unknown>;
accessToken: string;
refreshToken: string;
};
service: {
oneTimePassword: string;
};
project: {
id: string;
password: string;
basic: string;
};
git: {
name: string;
email: string;
credentials_cache_duration: number;
token: string | undefined;
};
vault: {
VAULT_ADDR: string;
VAULT_TOKEN: string;
VAULT_MOUNT: string;
VAULT_TOP_DIR: string;
};
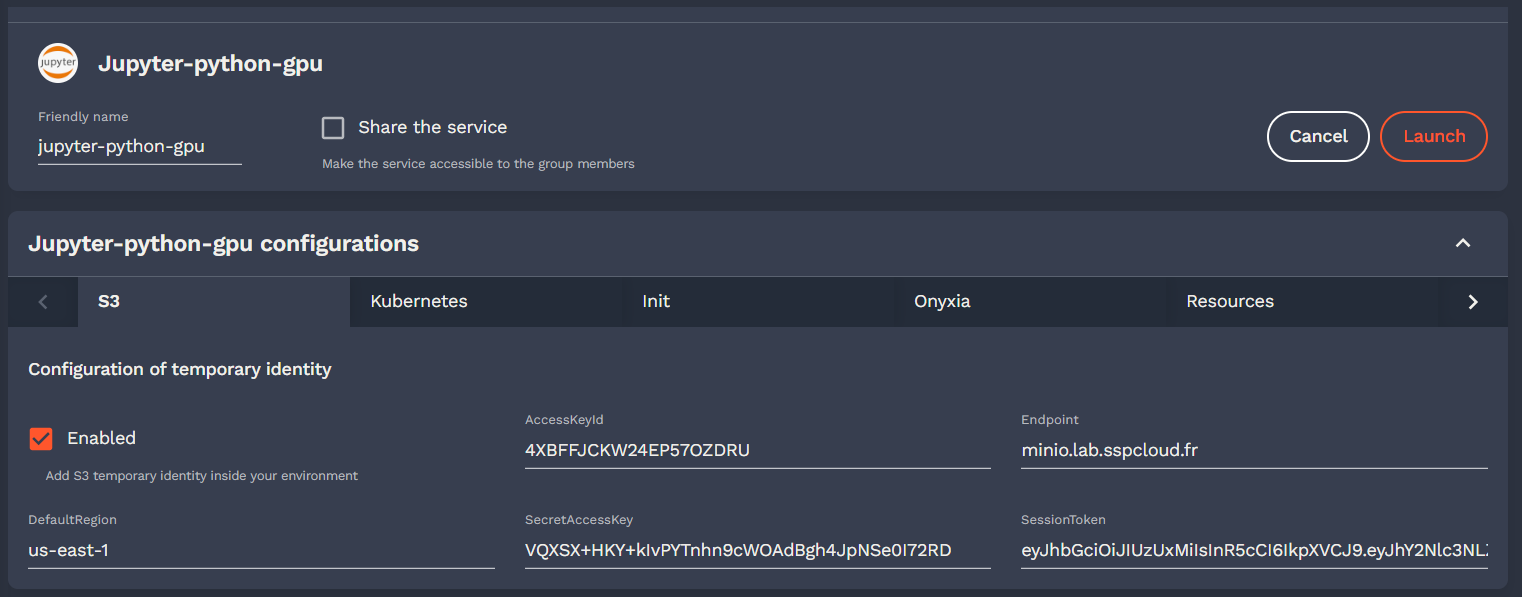
s3: {
AWS_ACCESS_KEY_ID: string;
AWS_SECRET_ACCESS_KEY: string;
AWS_SESSION_TOKEN: string;
AWS_DEFAULT_REGION: string;
AWS_S3_ENDPOINT: string;
AWS_BUCKET_NAME: string;
port: number;
pathStyleAccess: boolean;
/**
* The user is assumed to have read/write access on every
* object starting with this prefix on the bucket
**/
objectNamePrefix: string;
/**
* Only for making it easier for charts editors.
* <AWS_BUCKET_NAME>/<objectNamePrefix>
* */
workingDirectoryPath: string;
/**
* If true the bucket's (directory) should be accessible without any credentials.
* In this case s3.AWS_ACCESS_KEY_ID, s3.AWS_SECRET_ACCESS_KEY and s3.AWS_SESSION_TOKEN
* will be empty strings.
*/
isAnonymous: boolean;
};
region: {
defaultIpProtection: boolean | undefined;
defaultNetworkPolicy: boolean | undefined;
allowedURIPattern: string;
customValues: Record<string, unknown> | undefined;
kafka:
| {
url: string;
topicName: string;
}
| undefined;
tolerations: unknown[] | undefined;
from: unknown[] | undefined;
nodeSelector: Record<string, unknown> | undefined;
startupProbe: Record<string, unknown> | undefined;
sliders: Record<
string,
{
sliderMin: number;
sliderMax: number;
sliderStep: number;
sliderUnit: string;
}
>;
resources:
| {
cpuRequest?: `${number}${string}`;
cpuLimit?: `${number}${string}`;
memoryRequest?: `${number}${string}`;
memoryLimit?: `${number}${string}`;
disk?: `${number}${string}`;
gpu?: `${number}`;
}
| undefined;
};
k8s: {
domain: string;
ingressClassName: string | undefined;
ingress: boolean | undefined;
route: boolean | undefined;
istio:
| {
enabled: boolean;
gateways: string[];
}
| undefined;
randomSubdomain: string;
initScriptUrl: string;
useCertManager: boolean;
certManagerClusterIssuer: string | undefined;
};
proxyInjection:
| {
enabled: string | undefined;
httpProxyUrl: string | undefined;
httpsProxyUrl: string | undefined;
noProxy: string | undefined;
}
| undefined;
packageRepositoryInjection:
| {
cranProxyUrl: string | undefined;
condaProxyUrl: string | undefined;
packageManagerUrl: string | undefined;
pypiProxyUrl: string | undefined;
}
| undefined;
certificateAuthorityInjection:
| {
cacerts: string | undefined;
pathToCaBundle: string | undefined;
}
| undefined;
};"hostname": {
"type": "string",
"form": true,
"title": "Hostname",
"x-onyxia": {
"overwriteDefaultWith": "{{project.id}}-{{k8s.randomSubdomain}}.{{k8s.domain}}"
}
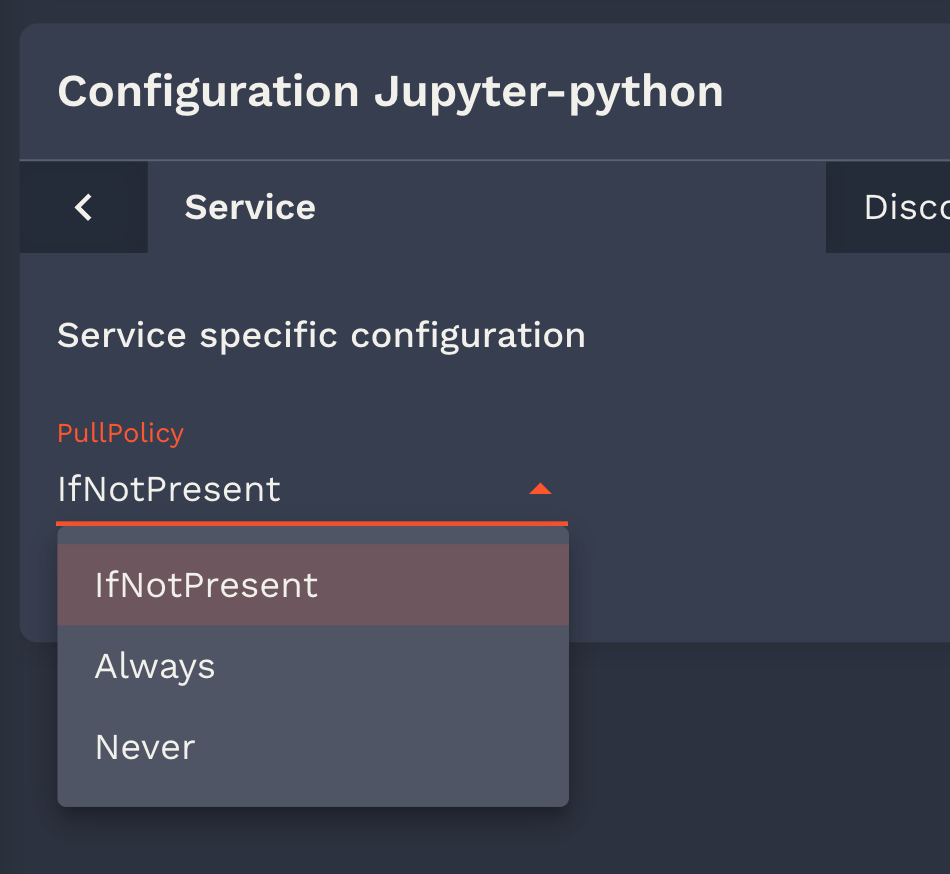
}"pullPolicy": {
"type": "string",
"default": "IfNotPresent",
"listEnum": [
"IfNotPresent",
"Always",
"Never"
]
}"group": {
"type": "string",
"default": "",
"listEnum": [""],
"x-onyxia": {
"overwriteDefaultWith": "user.decodedIdToken.groups[0]",
"overwriteListEnumWith": "user.decodedIdToken.groups"
}
}"nodeSelector": {
"type": "object",
"description": "NodeSelector",
"default": {},
"x-onyxia": {
"overwriteSchemaWith": "nodeSelector.json"
}
}{
"$schema": "http://json-schema.org/draft-07/schema#",
"title": "Node Selector",
"type": "object",
"description": "Node selector constraints for the pod",
"additionalProperties": {
"type": "string",
"description": "Key-value pairs to select nodes"
}
}{
"$schema": "http://json-schema.org/draft-07/schema#",
"title": "Node Selector",
"type": "object",
"properties": {
"disktype": {
"description": "The type of disk",
"type": "string",
"enum": ["ssd", "hdd"]
},
"gpu": {
"description": "The type of GPU",
"type": "string",
"enum": ["A2", "H100"]
}
},
"additionalProperties": false //any other label is disallowed
}{
"$schema": "http://json-schema.org/draft-07/schema#",
"title": "Role",
"type": "object",
"properties": {
"enabled": {
"type": "boolean",
"description": "allow your service to access your namespace ressources",
"default": true
},
"role": {
"type": "string",
"description": "bind your service account to this kubernetes default role",
"default": "view",
"enum": [
"view",
"edit",
"admin"
]
}
}
}
{
  "$schema": "http://json-schema.org/draft-07/schema#",
  "title": "Role",
  "type": "object",
  "properties": {
    "enabled": {
      "type": "boolean",
      "const": true,
      "description": "This value must always be true, allowing your service to access your namespace resources."
    },
    "role": {
      "type": "string",
      "const": "view",
      "description": "This value must always be 'view', binding your service account to this Kubernetes default role.",
    }
  }
}
{
    "$schema": "http://json-schema.org/draft-07/schema#",
    "title": "Resources",
    "description": "Your service will have at least the requested resources and never more than its limits. No limit for a resource and you can consume everything left on the host machine.",
    "type": "object",
    "properties": {
        "requests": {
            "description": "Guaranteed resources",
            "type": "object",
            "properties": {
                "cpu": {
                    "description": "The amount of cpu guaranteed",
                    "title": "CPU",
                    "type": "string",
                    "default": "100m",
                    "render": "slider",
                    "sliderMin": 50,
                    "sliderMax": 40000,
                    "sliderStep": 50,
                    "sliderUnit": "m",
                    "sliderExtremity": "down",
                    "sliderExtremitySemantic": "guaranteed",
                    "sliderRangeId": "cpu"
                },
                "memory": {
                    "description": "The amount of memory guaranteed",
                    "title": "memory",
                    "type": "string",
                    "default": "2Gi",
                    "render": "slider",
                    "sliderMin": 1,
                    "sliderMax": 200,
                    "sliderStep": 1,
                    "sliderUnit": "Gi",
                    "sliderExtremity": "down",
                    "sliderExtremitySemantic": "guaranteed",
                    "sliderRangeId": "memory"
                }
            }
        },
        "limits": {
            "description": "max resources",
            "type": "object",
            "properties": {
                "cpu": {
                    "description": "The maximum amount of cpu",
                    "title": "CPU",
                    "type": "string",
                    "default": "30000m",
                    "render": "slider",
                    "sliderMin": 50,
                    "sliderMax": 40000,
                    "sliderStep": 50,
                    "sliderUnit": "m",
                    "sliderExtremity": "up",
                    "sliderExtremitySemantic": "Maximum",
                    "sliderRangeId": "cpu"
                },
                "memory": {
                    "description": "The maximum amount of memory",
                    "title": "Memory",
                    "type": "string",
                    "default": "50Gi",
                    "render": "slider",
                    "sliderMin": 1,
                    "sliderMax": 200,
                    "sliderStep": 1,
                    "sliderUnit": "Gi",
                    "sliderExtremity": "up",
                    "sliderExtremitySemantic": "Maximum",
                    "sliderRangeId": "memory"
                }
            }
        }
    }
}
{
    "$schema": "http://json-schema.org/draft-07/schema#",
    "title": "Resources",
    "description": "Your service will have at least the requested resources and never more than its limits. No limit for a resource and you can consume everything left on the host machine.",
    "type": "object",
    "properties": {
        "requests": {
            "description": "Guaranteed resources",
            "type": "object",
            "properties": {
                "cpu": {
                    "description": "The amount of cpu guaranteed",
                    "title": "CPU",
                    "type": "string",
                    "default": "100m",
                    "render": "slider",
                    "sliderMin": 50,
                    "sliderMax": 10000,
                    "sliderStep": 50,
                    "sliderUnit": "m",
                    "sliderExtremity": "down",
                    "sliderExtremitySemantic": "guaranteed",
                    "sliderRangeId": "cpu"
                },
                "memory": {
                    "description": "The amount of memory guaranteed",
                    "title": "memory",
                    "type": "string",
                    "default": "2Gi",
                    "render": "slider",
                    "sliderMin": 1,
                    "sliderMax": 200,
                    "sliderStep": 1,
                    "sliderUnit": "Gi",
                    "sliderExtremity": "down",
                    "sliderExtremitySemantic": "guaranteed",
                    "sliderRangeId": "memory"
                }
            }
        },
        "limits": {
            "description": "max resources",
            "type": "object",
            "properties": {
                "cpu": {
                    "description": "The maximum amount of cpu",
                    "title": "CPU",
                    "type": "string",
                    "default": "5000m",
                    "render": "slider",
                    "sliderMin": 50,
                    "sliderMax": 10000,
                    "sliderStep": 50,
                    "sliderUnit": "m",
                    "sliderExtremity": "up",
                    "sliderExtremitySemantic": "Maximum",
                    "sliderRangeId": "cpu"
                },
                "memory": {
                    "description": "The maximum amount of memory",
                    "title": "Memory",
                    "type": "string",
                    "default": "50Gi",
                    "render": "slider",
                    "sliderMin": 1,
                    "sliderMax": 200,
                    "sliderStep": 1,
                    "sliderUnit": "Gi",
                    "sliderExtremity": "up",
                    "sliderExtremitySemantic": "Maximum",
                    "sliderRangeId": "memory"
                }
            }
        }
    }
}onyxia:
web:
# ...
api:
# ...
schemas:
enabled: true
files:
- relativePath: ide/resources.json
content: |
{
"$schema": "http://json-schema.org/draft-07/schema#",
"title": "Resources",
"description": "Your service will have at least the requested resources and never more than its limits. No limit for a resource and you can consume everything left on the host machine.",
"type": "object",
"properties": {
"requests": {
"description": "Guaranteed resources",
"type": "object",
"properties": {
"cpu": {
"description": "The amount of cpu guaranteed",
"title": "CPU",
"type": "string",
"default": "100m",
"render": "slider",
"sliderMin": 50,
"sliderMax": 10000,
"sliderStep": 50,
"sliderUnit": "m",
"sliderExtremity": "down",
"sliderExtremitySemantic": "guaranteed",
"sliderRangeId": "cpu"
},
"memory": {
"description": "The amount of memory guaranteed",
"title": "memory",
"type": "string",
"default": "2Gi",
"render": "slider",
"sliderMin": 1,
"sliderMax": 200,
"sliderStep": 1,
"sliderUnit": "Gi",
"sliderExtremity": "down",
"sliderExtremitySemantic": "guaranteed",
"sliderRangeId": "memory"
}
}
},
"limits": {
"description": "max resources",
"type": "object",
"properties": {
"cpu": {
"description": "The maximum amount of cpu",
"title": "CPU",
"type": "string",
"default": "5000m",
"render": "slider",
"sliderMin": 50,
"sliderMax": 10000,
"sliderStep": 50,
"sliderUnit": "m",
"sliderExtremity": "up",
"sliderExtremitySemantic": "Maximum",
"sliderRangeId": "cpu"
},
"memory": {
"description": "The maximum amount of memory",
"title": "Memory",
"type": "string",
"default": "50Gi",
"render": "slider",
"sliderMin": 1,
"sliderMax": 200,
"sliderStep": 1,
"sliderUnit": "Gi",
"sliderExtremity": "up",
"sliderExtremitySemantic": "Maximum",
"sliderRangeId": "memory"
}
}
}
}
}
- relativePath: nodeSelector.json
content: |
{
"$schema": "http://json-schema.org/draft-07/schema#",
"title": "Node Selector",
"type": "object",
"properties": {
"disktype": {
"description": "The type of disk",
"type": "string",
"enum": ["ssd", "hdd"]
},
"gpu": {
"description": "The type of GPU",
"type": "string",
"enum": ["A2", "H100"]
}
},
"additionalProperties": false
}
- relativePath: ide/role.json
content: |
{
"$schema": "http://json-schema.org/draft-07/schema#",
"title": "Role",
"type": "object",
"properties": {
"enabled": {
"type": "boolean",
"description": "allow your service to access your namespace ressources",
"default": true
},
"role": {
"type": "string",
"description": "bind your service account to this kubernetes default role",
"default": "view",
"hidden": {
"value": false,
"path": "kubernetes/enabled"
},
"enum": [
"view"
]
}
}
}


